I decided to create a final product from Physical Computing
because out of the four topics (Photography, web design, physical computing,
moving image), it seemed the most interactive and was something that I have
never done before. Our idea was to aim our product at young children. We decided
to make a night lamp for children to keep on their bedside table before they go
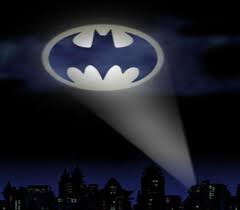
to sleep. Here are some images that inspired us:


These images caught my eye as patterns were cut into the lamp meaning that when it is turned on patterns are projected onto the walls, differntiating them from other mainstream lamps. As our product is aimed towards young children we took inspiration from the Batman movies and decided to have the logo on the top of the lamp projecting the bat symbol on to the wall. Similar to this...
Our first
step was to plan out what we wanted our lamp to look like. We decided to make our
lamp a cube shape and having a cut-out bat logo on the top allowing it to
project onto the wall.

Here is the basic cube net that our lamp will be constructed from.

Next we glued the paper net onto cardboard to make the lamp more sterdy and less fimsy.

After cutting out the cube template I began to cut Batman symbols out and stick them onto all sides of the cube.

Aafter sticking all of the symbols to the cube I labelled the side in which I wanted to cut out enabling the lamp to project the symbol (the top).


Next we started to begin the code for our arduino board. We wanted to create a code that allowed the lamp to change colour, therfore we added three different coloured LED's to our circuit (Green, blue, red).
** PRESS PLAY**
This is our coded sequence that will be placed inside the lamp projecting different coloured Batman logos.

Next we cut out the top Batman logo using a stanley knife therfore allowing the logo to be projected.

This was the finished cut out. Although it is not a perfect cut it will still allow the light to take the basic shape of the logo. It is also only a prototype therfore the cut out does not have to be exact.

We then put the arduino board into the cube and sealed it using a hot glue gun, ensuring that the net will stay closed and wont come apart.

Finished product image.
**PRESS PLAY**
Finished product video in the light.
**PRESS PLAY**
This final video shows the lamp in the dark, how the product should actually be used. The darkness allows the different colours to shine through the Bat symbol cut - out and project onto the ceiling. Overall, I am extremely happy with our lamp prototype and belive that if taken further in the future, and with the correct materials this could be a real product that could one day be availble for sale.
Final Image and video:
**PRESS PLAY**

No comments:
Post a Comment